Vacuum Forming plastic process with 3D Molds

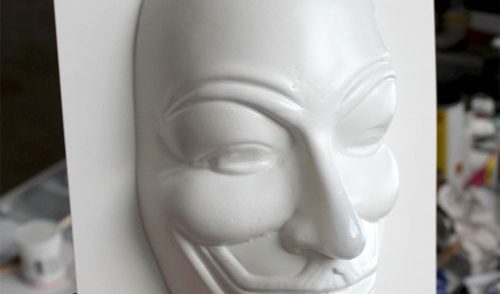
Manufacturers use vacuum forming to heat and press a sheet of plastic over a form, creating a part. This method produces many household products, including plastic containers, tubs, sink units, and electrical enclosures. While we used an industrial vacuum forming machine to achieve our application, you can also build one at home to achieve the same effect. This process took us about 1.30 hour from start to finish. SUPPLIES Heat resistant gloves, Eye protection, Cutting tool, Sheets of vacuum forming plastic, Vacuum forming machine, 3d printed mold, Mold mounting fixture STEP 1. ATTAIN YOUR MOLD In order to vacuum form you will need a mold to vacuum form around. Your final parts will be nearly exact replicas of your mold. When designing a mold for vacuum forming consider drafting angles. Drafting angles enable manufacturers to remove the molded part from the mold. They should typically be anywhere from 3-5 degrees from 90 on any vertical surface. STEP 2. GET READY YOUR MODEL Print your model with 4 shells at 25% infill. Increase shells and infill settings to create a strong mold that will withstand the pressures of vacuum forming. STEP 3. GET READY MOUNTING FIXTURE An industrial vacuum forming machine we needed to secure the mold to an additional fixture. This holds the mold in place against the various forces that occur when operating the machine. STEP 4. FILL UP AND HEAT PLASTIC ( i ) Load your plastic. When choosing plastic sheets for vacuum forming, consider the thickness of the plastic and the size of the sheet as well. You must heat thicker sheets to higher temperatures and use a higher-power vacuum. ( ii ) Heat plastic to desired temperature. An industrial vacuum forming machine, heated the plastic automatically to temperature based on the type of plastic, thickness, and density. Choose thinner sheets of plastic if your vacuum forming machine does not create large amounts of consistent heat or suction. Typically, you heat plastics to around 400 degrees Fahrenheit. STEP 5. PUSH DOWN PLASTIC OVER FORM Once plastic is heated, it is pushed over the form. At this stage, the vacuum suction pulls all the air out from under the heated plastic sheet, forcing it down over the mold. The plastic begins cooling instantly. STEP 6. LET PLASTIC COOL Once all of the air has been removed from under the plastic and it has been formed over your mold, remove the formed part and set it aside to cool. The mold is not removed from the machine between shots. STEP 7. DO IT AGAIN This process can be repeated to produce as many as you desired If you notice that over time your 3D printed mold becomes deformed due to heat or pressure, it might be time to print another. Because printing is such an inexpensive option for mold production, producing 2-3 spares up front is not cost or time prohibitive. STEP 8. AFTER PROCESS After you have produced the desired number of parts, cut away any spare plastic. You can cut away spare plastic using a manual cutting tool, or with a CNC. If you’re using a CNC, 3D printing is a good solution for creating custom fixtures. STEP 9. FINISHING Here, you can see what successfully vacuum formed plastic sheets look like.
Vacuum Forming Plastic Sheets

Vacuum forming, first developed in the 1930s, remains highly relevant today. With advancements in technology, combining vacuum forming with innovations such as 3D printing for tool design, thermo-formable ink technology, and In-Mold Decoration creates exciting possibilities. These methods are now widely adopted by the world’s largest brands and institutions. Leading organizations, including Dupont, BASF, and Cambridge University, collaborate with international technology centers to research advanced composite materials. This research continuously expands the potential applications of vacuum forming in high-tech industries. Additionally, the world’s top material science companies are investing in the development of thermo-formable plastics. These materials are not only more efficient to process but also environmentally friendly. However, forming engineering-grade and composite plastics is often more challenging. These materials require industrial-grade machinery to achieve successful results. To address this, a range of high-performance, compact machines has been developed. These machines bring industrial processing capabilities to lab environments, enabling efficient testing and research with new materials. Forming Applications In vacuum forming process not every design and shape is suitable but it remains the most cost effective and efficient method for processing the most diverse range of plastic processing applications. Vacuum forming machines are used by high profile customers such as Apple, Google, Disney, Bolshoi Ballet, Ford, Tesla, Ferrero Rocher, Nestle, Makita, Royal Air Force, Philips, Yale University, Dupont and many more across electronics, film & theatre, automotive, aerospace, confectionary, packaging, education and many more applications. The continually growing popularity of vacuum forming amongst these leading companies and institutions demonstrates the process remains the number one choice for a hugely diverse range of applications. A.L.Plastics | Marion Collection | Acrylic Depot
